
Nerve gliding exercises help irritated or compressed nerves move more freely through the tissue around them, often easing tingling, numbness, and shooting pain within weeks. They’re commonly used for sciatica, carpal tunnel, and cubital tunnel symptoms. Stop immediately if you feel sharp, electric pain or numbness that doesn’t fade, and see a clinician if weakness is present or getting worse.
TL;DR:
- Nerve gliding exercises should be performed gently and gradually, with progress monitored to avoid sharp pain or lingering numbness.
- Many individuals experience symptom relief within two to four weeks, but full recovery can take between eight to twelve weeks of consistent practice.
- The exercises target specific nerves in the arm and leg, with different patterns for median, ulnar, radial, and sciatic nerves, depending on symptoms.
- A typical daily protocol involves one to two sets of three to ten repetitions, performed one to three times, with adjustments based on irritation levels and personal sensitivity.
- Severe or persistent symptoms, especially spreading sensations or weakness, require professional evaluation and may need combined therapies beyond nerve gliding exercises.
Table of Contents
- What Are Nerve Gliding Exercises and Why Do They Work?
- How Do You Perform Upper Limb Nerve Glides?
- What Are the Best Lower Limb Nerve Glides for Sciatica?
- How Many Reps and Sets Should You Do Each Day?
- When Should You Stop a Nerve Gliding Exercise?
- How Do Nerve Glides Fit Into a Full Treatment Plan?
- How Can You Modify Nerve Glides for Your Situation?
- Key Takeaways for Nerve Gliding Exercises
- A Clinician’s Note on Supervising Nerve Glide Programs
- What I’d Tell a Patient Starting Out
- Ready for a Supervised Nerve Pain Assessment?
- Sources
- FAQ
What Are Nerve Gliding Exercises and Why Do They Work?
Nerve gliding exercises, sometimes called nerve flossing, are small, controlled movements that let a nerve slide back and forth within its surrounding tunnel of muscle, tendon, and connective tissue. That’s different from static stretching, which pulls tissue and holds it. Nerve glides work through neurodynamics, the study of how nerves move and respond to tension during normal joint motion.
Neurodynamics reframes nerve pain as a mobility and sensitivity problem rather than a structural one. That shift matters because it explains why gentle movement, not aggressive stretching, tends to calm an irritated nerve down.
The movement pattern behind a glide increases local blood flow and appears to reduce how reactive, or “mechanosensitive,” an irritated nerve is to normal motion, according to a physical therapy resource on nerve gliding. This is supported by peer-reviewed research on neurodynamic techniques, which links these movements to measurable improvements in nerve-related pain and function.
What to expect timeline-wise:
- Many people notice some easing of tingling or pain within 2 to 4 weeks of consistent practice.
- Fuller improvement, including better range of motion and less frequent flare-ups, often takes 8 to 12 weeks, per the same nerve flossing research.
- Progress isn’t always linear. Some days feel better than others even when the nerve is healing.
How Do You Perform Upper Limb Nerve Glides?
The three nerves most commonly targeted in the arm and hand each have their own glide pattern, and getting the sequence right matters more than moving fast.
- Median nerve glide. Sit tall, extend your arm to the side at shoulder height with your palm up. Gently extend your wrist back, then tilt your head away from that arm. You should feel a mild stretch or tingle along the inside of the forearm, not sharp pain. Hold each position for 1 to 2 seconds and repeat for 3 to 10 reps. Progress by slightly increasing wrist extension once the movement feels easy.
- Ulnar nerve glide. Start with your arm out to the side, elbow bent, palm facing your face. Slowly straighten the elbow while rotating the wrist so your palm faces away, then bend it back. This targets the nerve that runs behind the elbow, so go slowly if you have cubital tunnel symptoms. A pulling sensation along the inner elbow and pinky-side forearm is normal.
- Radial nerve glide. With your arm at your side, internally rotate the shoulder, extend the elbow, and bend the wrist down and in, like you’re pointing your thumb toward the floor behind you. This one often targets forearm and thumb-side wrist symptoms, including some cases of tennis elbow-type pain.
Pro Tip: Keep breathing normally throughout each rep. Holding your breath tenses everything, including the nerve you’re trying to relax. If you’re at a desk, three or four reps of any of these during a coffee break is enough to count.
For persistent forearm or wrist symptoms, relieving nerve compression safely covers additional cues that pair well with these glides.
What Are the Best Lower Limb Nerve Glides for Sciatica?
Sciatic and tibial nerve glides target the nerve pathway running from the lower back through the buttock and down the leg, which is where sciatica-type symptoms usually show up.
- Supine strap glide. Lie on your back and loop a strap, towel, or resistance band around the ball of your foot on the affected side. Raise the leg until you feel a mild stretch, then slowly bend and straighten the knee while keeping the hip still. Pull the strap only enough to feel tension, not pain, behind the knee or in the calf. Do 3 to 10 reps.
- Seated slider. Sit at the edge of a chair, straighten the affected knee while pointing your toes up, and simultaneously tip your head forward. Reverse both movements together: bend the knee and tilt your head back. This is easy to do at a desk and works well as a quick reset between meetings.
- Standing variant. Stand holding a wall or chair for balance, extend the leg slightly forward with a straight knee, and pump the ankle from pointed to flexed a few times. This is a portable option for travel days or when lying down isn’t practical.
Pair these with gentle hamstring and calf mobility work, but don’t force a deep stretch at the same time as the glide. The goal is nerve movement, not muscle lengthening, and combining the two too aggressively can backfire. A guide to nerve-related leg pain relief breaks down how these pair with other sciatica-specific care.
How Many Reps and Sets Should You Do Each Day?
A basic home protocol is 1 to 2 sets of 3 to 10 repetitions, done 1 to 3 times daily, according to guidance summarized in reporting on nerve flossing. Sessions can be short, sometimes under a minute, which is part of what makes glides easy to stick with.
- Start at the low end of the rep range and the smaller range of motion.
- Increase reps or range gradually, not both at once.
- Avoid speeding up the movement even as it gets easier. Slow and controlled beats fast and forceful.
- Recheck your symptoms weekly and log anything that’s changed, better or worse.
A realistic marker: if you’ve been consistent for six weeks with no change at all, that’s the point to check in with a clinician rather than keep pushing the same routine.
When Should You Stop a Nerve Gliding Exercise?
The pain rule is the single most important safety guideline here: a mild stretch or a light tingle is fine, but sharp, electric pain, or numbness that lingers, is not. Clinicians use this exact rule to guide how far patients should move, according to nerve flossing guidance.
- Stop the exercise if pain feels sharp, burning, or shock-like rather than a gentle pull.
- If symptoms flare up and stay worse for more than about an hour afterward, ease off and reassess before your next session.
- Seek prompt evaluation for new or worsening weakness, symptoms that spread rapidly, or nerve pain following recent surgery or trauma.
- Don’t push through numbness that doesn’t resolve within minutes of stopping.
Pro Tip: If you’re not sure whether a sensation counts as “sharp,” ask yourself if you’d keep doing the movement in front of a physical therapist. If the honest answer is no, stop.
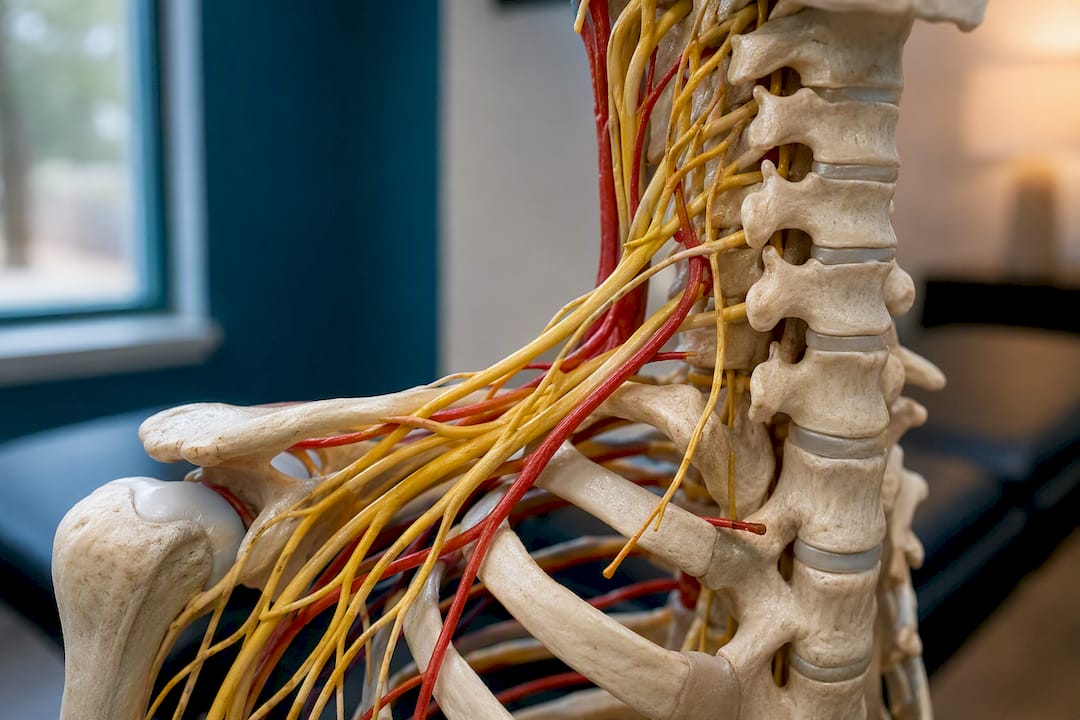
Symptoms like these that involve the neck deserve particular attention. What a pinched nerve in the neck actually feels like walks through warning signs worth knowing before you start any home program.
How Do Nerve Glides Fit Into a Full Treatment Plan?
Nerve glides work best as one piece of a broader plan, not a standalone fix. Clinicians often pair them with ergonomic changes, activity modification, targeted strengthening, and manual therapy or nerve decompression techniques when the case calls for it, a point echoed in clinical reviews of neural mobilization.
- Ergonomic adjustments at a desk or workstation reduce the repetitive positions that irritate a nerve in the first place.
- Strengthening exercises around the affected joint, like targeted forearm and grip work, support the nerve’s mechanical environment once acute symptoms settle.
- Imaging or specialist referral usually comes into play only with progressive weakness or red-flag symptoms, not routine tingling.
Before an appointment, bring a short symptom log: when symptoms started, what movements provoke them, and any medications you’re taking. That single page often speeds up an accurate diagnosis more than a verbal recap does. Movement-based rehabilitation approaches offer useful background on how glides sit alongside other hands-on care.
How Can You Modify Nerve Glides for Your Situation?
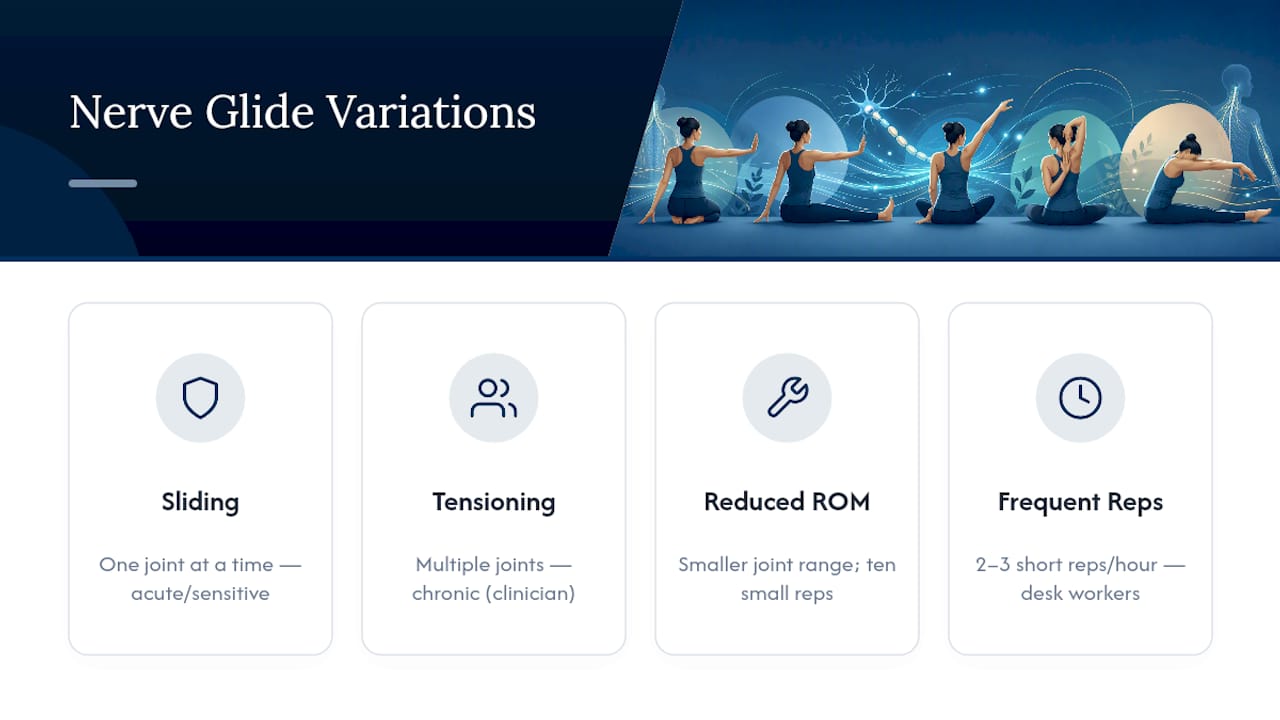
Not everyone should start at the same intensity, and the right variation depends on how irritated the nerve currently is.
For acute or highly sensitive symptoms: stick to what’s sometimes called a “sliding” technique, where one joint moves at a time rather than several joints simultaneously. This produces less tension on the nerve overall and is the gentler starting point if symptoms flare easily.
For more stable, chronic symptoms: a “tensioning” version, where multiple joints move together to lengthen the nerve’s pathway, can be appropriate under clinical guidance, though it should never be your default starting point without professional input.
For older adults or those with joint restrictions: reduce the range of motion at each joint involved and rely more on repetition than depth. Ten small, controlled reps beat three aggressive ones.

For desk workers with mild, intermittent symptoms: shorter, more frequent sessions, two or three reps every hour, often work better than one longer session, since nerves respond well to gentle, repeated movement rather than sustained load.
If you have diabetes, a prior nerve injury, or a connective tissue condition: check with a clinician before starting, since nerve sensitivity and healing time can differ from the general population, and standard rep ranges may need adjusting.
Key Takeaways for Nerve Gliding Exercises
- Start gentle, follow the recommended dosage, and stop for any sharp pain or lingering numbness.
- Expect early changes within 2 to 4 weeks and plan a check-in around 6 weeks.
- Book a clinical assessment if symptoms worsen, spread, or don’t budge after consistent effort.
| Action | Target | Timing |
|---|---|---|
| Perform glides | 3 to 10 reps, 1 to 2 sets | 1 to 3 times daily |
| Watch for red flags | Sharp pain, spreading numbness, weakness | Any session |
| Reassess progress | Symptom log review | Around 6 weeks |
A Clinician’s Note on Supervising Nerve Glide Programs
At Evertonchiropractic, tailoring the glide to the specific nerve involved, and pairing it with ergonomic and strengthening advice, tends to produce more durable results than handing someone a generic sheet of exercises. Progress gets tracked with a simple symptom log and a scheduled reassessment around the six-week mark, which is the enough time to see whether a program is actually working or needs adjusting.
Nerve tissue doesn’t respond well to guesswork. What looks like a minor tweak to a glide, wrist angle, head position, speed, can change how much tension a nerve actually experiences.
If your symptoms are severe, spreading, or simply not improving, that’s the point to bring your notes in for a proper assessment rather than keep adjusting the routine on your own.
What I’d Tell a Patient Starting Out
Most people undershoot how gentle these movements should be at first, then get frustrated when nothing changes. Progress with nerve glides is quiet and slow, and that’s normal. Bring your symptom notes and your questions to whoever is guiding your program. Vague descriptions like “it hurts sometimes” are far less useful than “sharp pain at the elbow after typing for 20 minutes.”
— Aman
Ready for a Supervised Nerve Pain Assessment?
Self-guided glides help many people, but they have limits, especially when symptoms are severe, spreading, or simply not responding after a few weeks of consistent effort. Evertonchiropractic offers what a printed exercise sheet can’t: a hands-on assessment that identifies exactly which nerve is involved, how compressed it is, and whether decompression or manual therapy should be added to your home program.

Dr. Richard’s approach starts with figuring out the actual mechanical cause behind your symptoms rather than treating tingling and pain as an isolated problem to manage forever. If you’ve been doing glides for a few weeks without change, or you’re dealing with sciatica, carpal tunnel, or cubital tunnel symptoms that keep coming back, a supervised assessment can clarify what’s actually driving the irritation. Explore long-term pain relief approaches that go beyond symptom management, or book a visit to get your specific nerve pain assessed and addressed at the source.
Sources
This article is general information, not a substitute for advice from a qualified doctor. Consult a qualified healthcare professional about your own circumstances before acting on anything here.
FAQ
Do Nerve Gliding Exercises Actually Work?
Research on neurodynamic techniques supports meaningful improvements in nerve-related pain and function for many people, particularly when the program is individualized and done consistently rather than sporadically.
Can You Do Nerve Glides Every Day?
Yes. A common protocol is 1 to 2 sets of 3 to 10 reps, 1 to 3 times daily, and daily practice at this low intensity is generally considered safe as long as you follow the pain rule.
How Long Does It Take for Nerve Gliding to Work?
Many people notice initial easing of symptoms within 2 to 4 weeks, with fuller improvement in range of motion and symptom frequency often taking 8 to 12 weeks of consistent practice.
Do Nerve Glides Help With Carpal Tunnel Symptoms?
Median nerve glides are commonly used for carpal tunnel symptoms and can ease tingling and improve wrist mobility, though more severe or long-standing cases often need additional care such as ergonomic changes or clinical treatment through a provider like Evertonchiropractic.